If you've read What is a Zing?, you are now ready to start creating Zings from your own content
Step1: Get to Know Your ZingFrog Avatars
Audio Zings are read by Avatars. After logging into the ZingFrog administrative system, you can explore these by clicking on the "ZingFrog Avatars" link on the left menu.
These are the stock ZingFrog Avatars. Your screen will have Avatars like this:![]()
Click on the Audio Play arrow to hear a sample of what the Avatar sounds like.
Make sure to note what Avatars you like!
Step 2: Get Started with the Zing Director
The next step is to create you own Zing! While the article Zing Director - Get started guides you through the process of creating a Zing, the general process assumes that you have setup the WordPress plugin, which we will discuss later.
Here are a couple tips to quickly see what a Zing will look like.
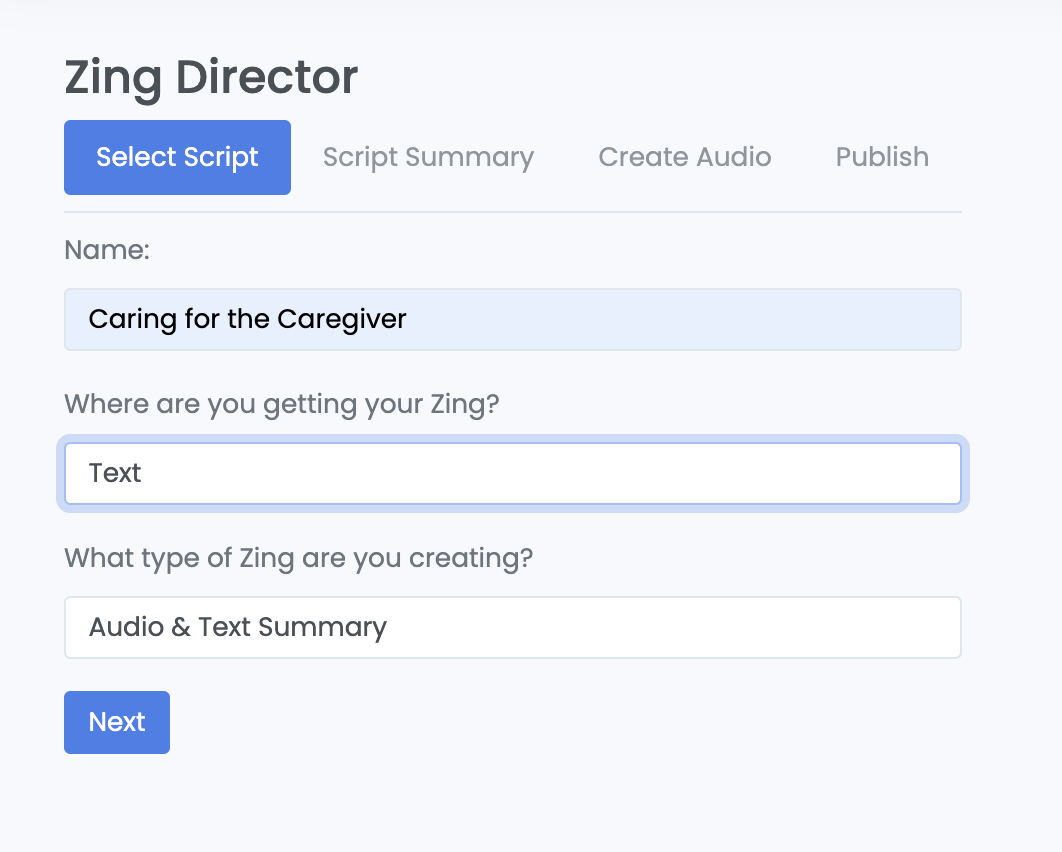
To start your first Zing, click on “Zing Director” towards the middle of the left menu.
For the second dropdown, "Where are you getting your Zing" you have two options:
- Webpage URL - this pulls the content from your website. This assumes you have either Setup your WordPress Plugin or you have worked with ZingFrog staff to pull your website content without WordPress.
- Text - you will manually post the content of your article on the next page.
Since you have probably not setup the WordPress plugin yet, click on Text. (Once your website is connected to ZingFrog, you will probably be using the "Webpage URL" option.)
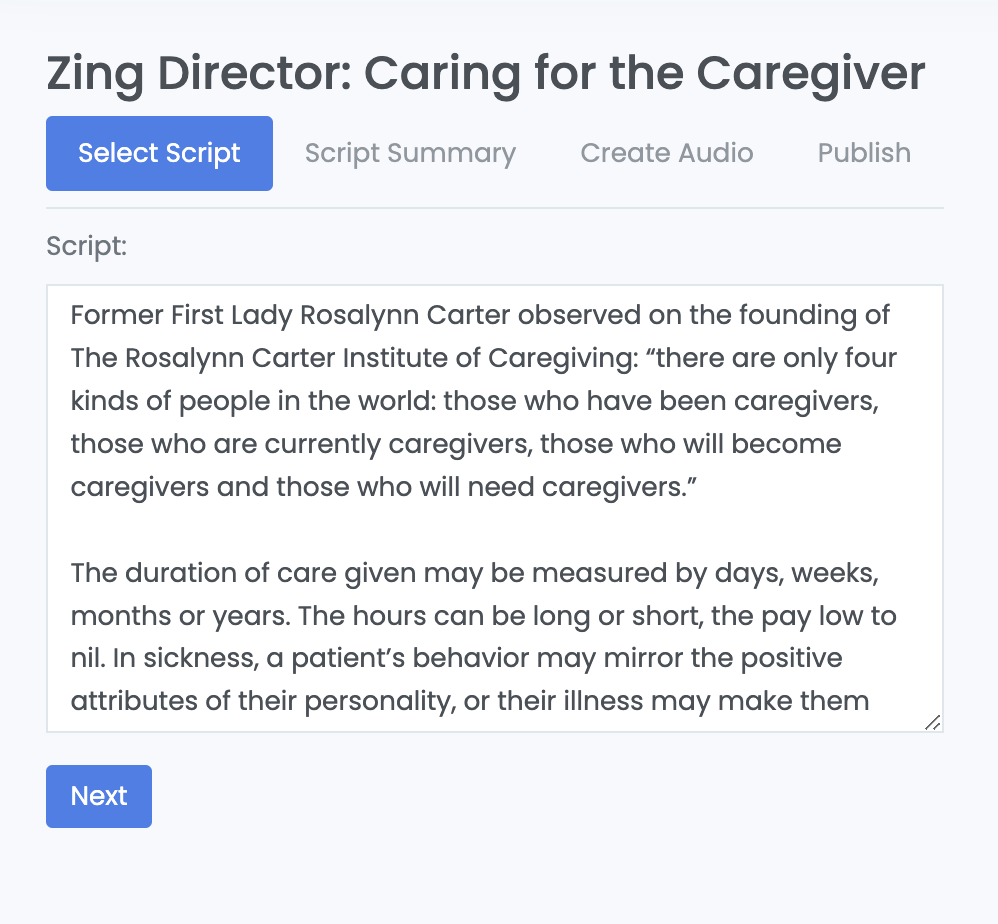
After you click on the Next button, you can then simply paste in the content of your article into the "Script" text area.
After you click on the "Next" button, the following few steps would be the same for most Zings:
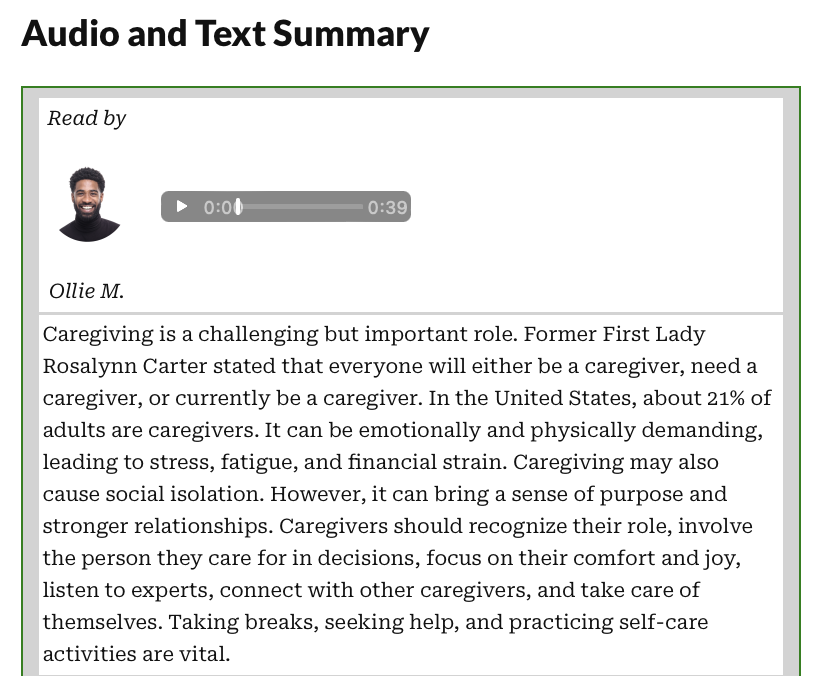
After you create the audio you can preview your Zing and listen to the audio:
If you have not setup the WordPress plugin, the only way you can update your website is to copy the Zing's JavaScript into your site, as the Publish Your Zing! article describes.
Step 3: Setup Your WordPress plugin
This is the key step. See these articles for details:
Connect the WordPress Plugin to ZingFrog
After this is setup, you can now publish your Zings directly to your website! See the Publish Your Zing! article for how Zings can be posted to your site. At this point, the Zing Director is now fully operational for your site!
Please note: since this step can be a little tricky, the ZIngFrog support team is ready to help - just open a ticket from the "Support Ticket" dropdown under profile.
Also, we do have alternatives to the WordPress plugin. See Zinging without the WordPress Plugin for details.
Step 4: Create Custom Avatars and Explore Casting Call
You can expand on the ZingFrog Avatars of Step 1 to Create Your Own Custom Avatars. Just upload your own profile image to have an Avatar made for your needs:
![]()
You can then go to Casting Call which allows you to create groups of Avatars.
The Casting Call features serves a couple of purposes:
- Makes it easier to find an Avatar when using Zing Director
- Set targets of Avatars for Website Zing automations
Step 4: Setup Website Zing Automations
Website Zing Automations is one of the most powerful features of the ZingFrog system. Once it is setup, ZingFrog automatically looks for new posts on your website and generates a Zing for them using the rules you setup. The article Getting started with Website Zing Automations walks you through the process.
Step 5: Learn How Zing Credit Pricing Works
The last thing you need to know about ZingFrog is that we use the increasing popular model of credits to price your Zings. This model is popular because you only buy what you need, when you need it. This Zing Credit Pricing article walks you how Zing Credits work and you can purchase the licenses you need.
That's it! We welcome you to the ZingFrog team and we genuinely hope your team and users value the Zing experience!